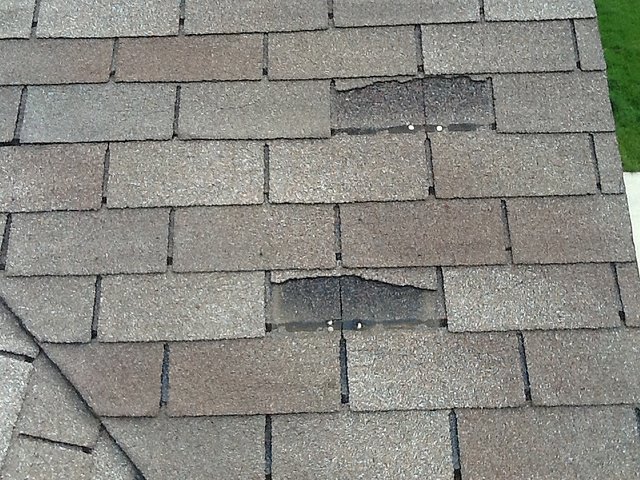
 Inspect for wind, snow, or ice damage. Check to see that the roof shingles are secure, tightly fastened and in good condition. If any of the shingles are loose, repair with asphalt roofing cement. If they are damaged or missing, replacement will be necessary and may require professional help.
Inspect the flashing around the chimney, plumbing vent stacks, electrical masts, and in valleys where roofing sections meet. Repair or re-flash if the flashing has deteriorated. SAFETY NOTICE - Homeowners often want to perform maintenance themselves to save money. It is important to keep in mind that there are many areas of home maintenance that are best left to professionals. For example, electrical work, entering an attic, or climbing on roofs and ladders to name a few of the hazardous activities. It is better to take the safe choice if there is any question as to the ability of the homeowner to perform any maintenance task. For more seasonal tips for the maintenance of your home, go to the “Home Maintenance” section of our website at: www.CanadianResidential.com
0 Comments
Proper maintenance of your hot water heater is important to the unit’s longevity – click below to watch an instructional video or visit: https://www.canadianresidential.com/home-maintenance-tips/HotWaterTankMaintenance/ Important: Before you start any maintenance – consult your water heaters owner’s manual and make sure you follow all warning and safety precautions.  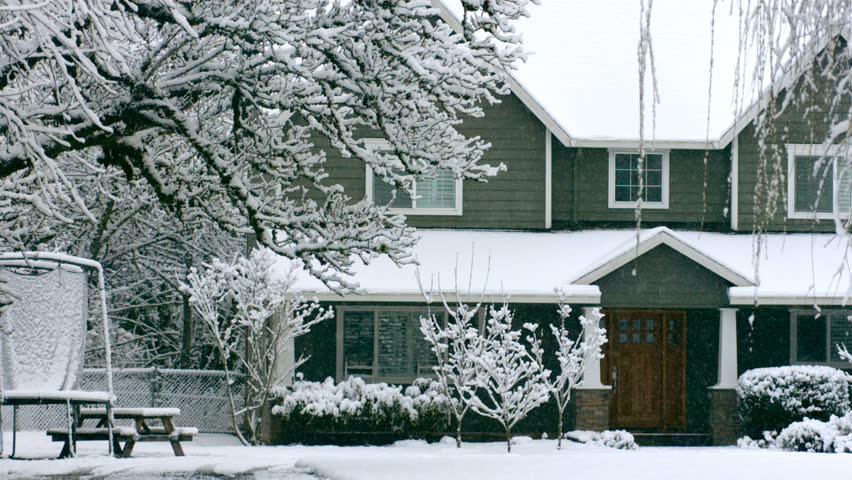 Our Canadian Winters have their frosty reputation for good reason. These extreme temperatures can affect the condition of your home and how it functions.
Removing Snow Safely Your roof is one of the most important lines of defense between you and the natural elements. It helps keep warm air locked in during the winter months and prevents snow, rain or the cold from penetrating the exterior of your home. A certain amount of snow accumulation on your roof is normal. However, if there is an excessive accumulation on the roof of your home, particularly if the snow is wet, there is a possibility of damage to the structure of the property. Flat or low sloped roofs usually have a greater risk of damage. An excessive load of snow accumulating on a roof may actually cause the roof to cave in. However, removing the snow from your roof can be a dangerous task. If you are not sure how to safely remove the snow from your roof then do not hesitate to hire a professional to remove the snow for you. Avoiding Ice Dams This is an ideal time to examine your attic for frost accumulation. Look for excessive frost or staining of the wood on the underside of the roof. Ice dams on the exterior surface of the roof can be a problem, particularly for low-sloped roofs with an overhang. This is the result of snow accumulation on the roof and is more common on poorly insulated homes. After a snowfall, heat escapes from the attic and melts the snow on the roof. The water runs down and encounters the snow on the overhang, which has not melted because there is no attic below it. The water, which meets this snow, will freeze forming a dam at the lower edge of the roof. This moisture can then back up beneath the shingles and result in damage below. A well-insulated and ventilated attic will help reduce this problem; consult a roofing/insulation professional. Clear Snow from Vents Make sure that all snow, ice and other obstructions are removed from your venting systems during the winter months. Keep an eye on outdoor vents, gas meters and chimneys for ice or snow buildup. Abnormal snow and ice build-up may block gas appliance exhaust and combustion air vents (especially those side wall vents exiting close to ground level) causing appliance failure as well as possible buildup of Carbon Monoxide. 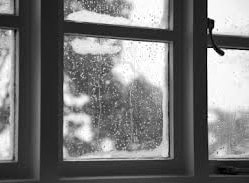 Well, it’s Canada, it’s winter, and it’s cold!
Have you noticed condensation along the bottom of your windows? This can create an environment where mould or mildew could grow in your home. To keep windows free of moisture, and thereby helping to prevent mould from growing, make sure that your HRV (heat recovery ventilation) systems are cleaned, serviced and running effectively. This is particularly important during the colder months. If you are living in an older property without a properly installed ventilation system, you should be running your bathroom fans before you start your shower and allowing them to run for at least 15 minutes after your shower is done. The same applies to your kitchen exhaust fans when cooking. The goal is to remove excess moisture from your home. If you haven’t already, now is the time to take off the screens on your windows thus allowing better air circulation to help prevent accumulation of condensation or ice build-up on your windows. December is already a very busy month, so we won’t add too much to your To-Do List. Furnace Filters: Improve your indoor air quality by changing the furnace filters. Ideally, you should change the filters every three months during the heating season, more often if you have pets. Maintaining a good airflow will keep your furnace from working harder, saving you money. Dryer Vents: Clean your outside dryer vents. Check the outdoor vent while the dryer is running to ensure air is flowing freely. If lint is allowed to clog the vent, the dryer will have to work harder to dry the clothing, raising energy costs and can become a fire hazard. Blockages in the venting system of a gas clothes dryer can allow harmful carbon monoxide fumes to backup into the home. Finally, ensure all dryer vents are metal, not plastic.  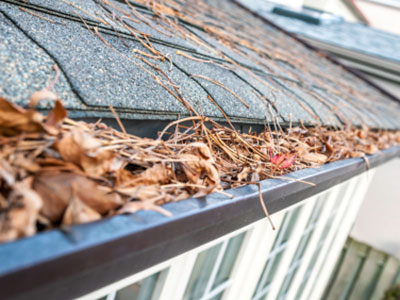 Some areas of the country have already had an early start to winter and for the rest of us, time is getting short.
Once the leaves are off the trees it is a good idea to clean the eavestrough, downspouts, gutters and valleys as melting snow in winter months can result in ice dams and unnecessary weight in the eavestrough which cannot drain properly. When you are outside cleaning your eavestroughs it is also a good time to take a quick look at any trees on your property. Look to see if any limbs are brushing up against your house, near your chimney or are in contact / close proximity with your power or telephone lines. Damage can occur as result of high winds or snow-laden boughs. Appropriate trimming by a licensed arborist now may save you considerable inconvenience this winter. Also look for trees that are leaning and may come down on a power line and contact the utility company for removal. If you have a snowblower, now is a good time to check and make sure it will run properly when you need it. You may want to change the oil and replace the spark plug. If you use de-icers pick them up early so you have them on hand when you need them. Remember some of these products are not recommended for properties with wells or concrete surfaces. For locations where chemical de-icers are not appropriate, sand or non-clumping kitty litter will provide some traction but do not melt snow. 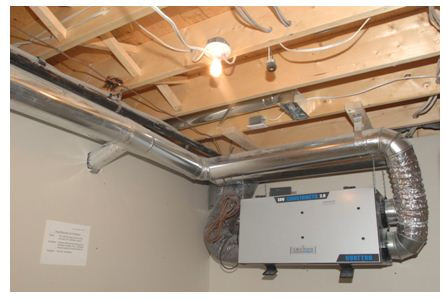 To keep your HRV working at peak performance, it should be cleaned twice a year in spring and fall.
Turn off the HRV and unplug it. Open and clean inside the machine. Remove and clean or replace, the filters. Slide out and clean the core by dunking in a bucket of soapy water. Replace when dry. Check to see if your HRV has a condensate drain — a pipe or plastic tube coming out of the bottom. If so, slowly pour about two litres of warm, clean water in each drain pan inside the HRV to make sure it is flowing freely. Next, go to the exterior of the house where the intake and exhaust vents are located. These vents have screens which must be cleaned, especially the intake vent which is most commonly clogged with insects and debris. Remove and inspect the vents and vacuum out the ducts. Making sure these vents are clear will ensure the air in your home is healthy for your family and allow your air exchanger to work more efficiently. It is also a good idea in winter to check that the vents are clear of snow or ice buildup. For additional instruction, here is a link to a detailed video on cleaning your HRV: https://www.youtube.com/embed/BCf1FECm93M?rel=0 For more seasonal tips for the maintenance of your home, go to the “Home Maintenance” section of our website at: www.CanadianResidential.com 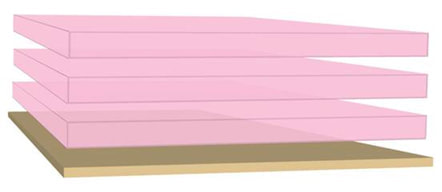 If your attic hatch isn't sealed, it's an escape hatch for heating, cooling and the hard-earned money spent on higher utility bills to pay for both.
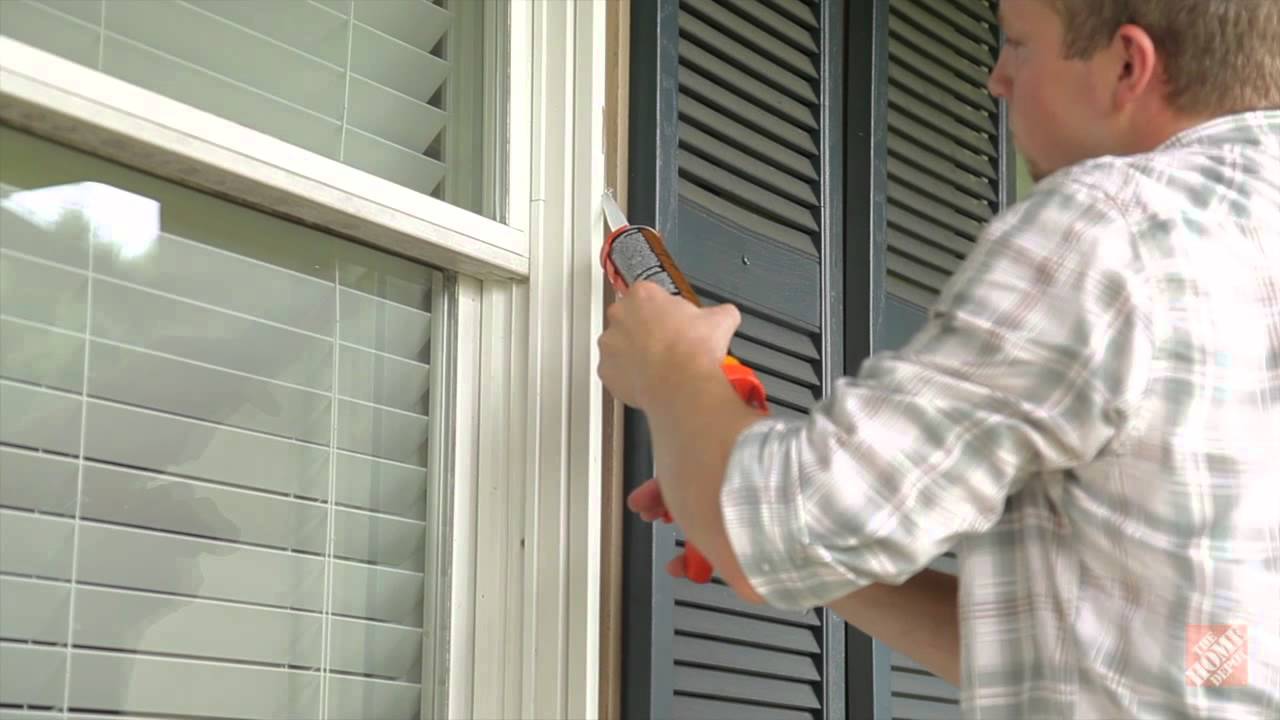
Attic hatches are often under the radar when it comes to eliminating sources of energy loss in your home. It's not uncommon to find homeowners who have upgraded attic insulation yet neglected this gaping energy hole that allows heat to escape your living spaces in winter and invade in summer. When a typical attic hatch isn't properly sealed, the hatch alone can lose more energy than the entire ceiling. This is also a common area for mould to develop as the moisture from the interior air frosts and condenses around the both the hatch and the housing around the lid. An attic hatch leaks energy in two ways: Direct air leaks around the trim and by conduction through the thin plywood board or drywall material the hatch is made of. Check your attic hatch for best airtight seal it should have rigid foam insulation layered on the hatch door and weatherstripping around the wood trim lip. Finally, the joint between the trim and the ceiling should be caulked. The end of August or beginning of September is an excellent time of the year to do an exterior check-up on your home so that any necessary repairs or maintenance can be completed before winter arrives. Check all your exterior wood trim, particularly around window and door openings. Where required, scrape and paint all exterior wood trim. Exposed wood will eventually deteriorate, resulting in wood rot and water leakage. Check the caulking around exterior window and door openings. Recaulk where you notice deterioration. Replace any damaged weather stripping to ensure that your home is energy efficient and water tight. Do a quick check of your roofing shingles. Repairs are more easily completed when the shingles are still soft and pliable in the early fall. While you’re looking at the roof, check the flashings around the chimney and plumbing stacks. The flashings help protect those transition areas from water penetration. Check for flashings that have lifted, cracked or separated and could allow water entry.
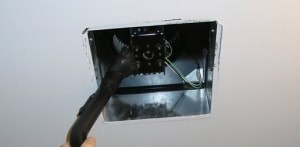 It is very important to have a properly operating bathroom fan that is vented to the outdoors. The fan should always be run for 15-20 minutes after a shower/bath to remove excess moisture from the bathroom.
Consider changing the "manual fan switch" to either a timer switch or an automatic humidistat to ensure adequate removal of humidity. As air and humidity are drawn through the fan, so too are dust and dirt therefore, the fan should be cleaned every six months. For safety, before you clean the fan turn off the circuit breaker to cut the power running to it. Remove the cover by pulling down until the cover is several inches from the ceiling. Press the spring-loaded wire clips, found on two sides of the cover together, then remove the clips from the slots in the housing. Vacuum off the cover and then clean it in the sink with soap and water if necessary. Vacuum inside the fan housing and blades. Reinstall the fan cover by pressing the clips on the fan together and slipping them over the slots in the fan housing. Then push the fan cover up until it seals against the ceiling. When you’re all done, turn the breaker back on. Finally test the suction by turning the fan on and placing a tissue against it to see if the suction will hold it there |